A Simple Guide to Sourdough Starter

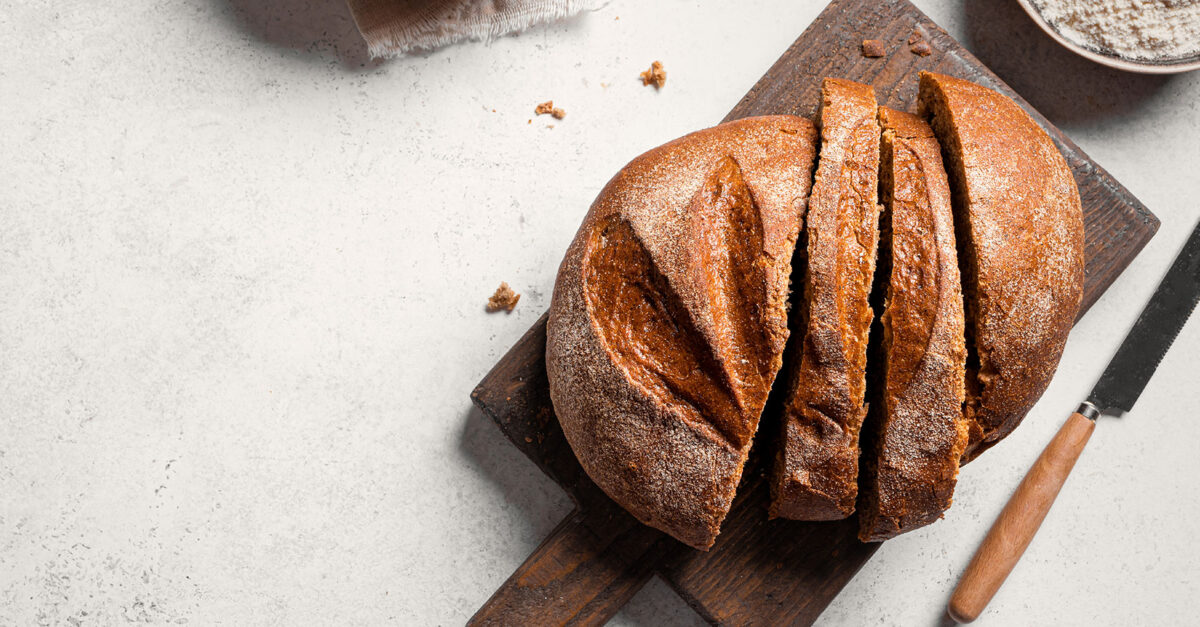
There’s something irresistible about the aroma and taste of freshly baked bread.
Warm, golden, and crunchy on the outside, it’s enough to drive anyone to learn to make their own. However, the baking process can sometimes feel intimidating—especially when it comes to sourdough, which relies on a starter that requires constant care and attention. The good news? With the right tools and instructions, creating and maintaining one may be simpler than it seems.
Why sourdough?
Sourdough is the oldest known type of leavened bread, but unlike others, it doesn’t contain baker’s yeast. Instead, its key ingredient is a starter: a basic mixture of water and flour that cultivates wild yeast and bacteria present in the environment, triggering a natural fermentation process that produces lactic acid. This is what gives sourdough its signature tangy flavor.
As a bonus, the process also breaks down certain acids commonly found in other breads, increasing the nutrients in sourdough and reducing its overall gluten content, which may make it a good option for those with such a sensitivity. And once established, a healthy starter can keep for years, with some even lasting for generations. In fact, there’s even one that originates from ancient Egypt, dating back over 4,500 years.
Creating your sourdough starter
As noted above, a starter generally consists of only two main ingredients, though for the purpose of speeding up fermentation, this recipe will use two types of flour: whole-wheat flour at the beginning to create it and unbleached flour later to feed it. As for the steps, they likewise are not overly complex but do require careful attention over the course of a week. Give it the proper time and patience, and you can develop a high-quality, long-lasting starter for baking fresh sourdough bread whenever the whim strikes you can share with family and friends.
Ingredients:
Whole-wheat flour
Filtered water
Unbleached flour
Equipment:
1-liter glass jar with a lid
Fork
Rubber spatula
Digital scale
Rubber band
Instructions:
Day 1: Using your digital scale to measure, add 60 grams of whole-wheat flour and 60 grams of water to your glass jar. (Make sure to press the tare button after setting your jar on the scale to reset it to 0 before adding the ingredients.) Stir everything together using the fork until fully combined, creating a thick mixture. Loosely close the lid, and let it sit at room temperature (approximately 70–75°F).
Day 2: Allow the mixture to rest for a full day, only stirring it once or twice to oxygenate it. You may see some bubbles forming, which is a sign that it’s beginning to ferment.
Day 3: After another twenty-four hours, your starter should have more bubbles. You may also notice a brown liquid on top that has a very pungent smell. This is completely normal and, like the bubbles, is an indication that it’s time to start the feeding process; you’ll just want to pour it off before you begin.
To feed, discard half of your starter, then add 60 grams each of unbleached flour and water, using the scale to weigh out the correct amounts. (Note: it’s extremely important that you don’t skip the discard since this could lead to underfeeding your starter or creating an overly acidic mixture.) Stir well—you should have a thick, pancake-like consistency after this and subsequent feeds. Scrape down the sides of the jar with the rubber spatula, and loosely close the lid.
Days 4–7: Continue feeding your starter as outlined in Day 3. It should gradually rise and form more bubbles. You can track its growth by placing a rubber band on the outside of your jar when you’ve completed each feed.
Day 8: At this point, your starter should have plenty of small and large bubbles, a spongy texture, and a tangy aroma. This means that it’s likely active and ready for baking! You can confirm by doing a float test, which involves placing a teaspoon of starter in a bowl of water and seeing if it floats on top. Another option is to feed it one more time and check if it doubles in size after four to twelve hours. If neither yields positive results, you can repeat the feeding process as outlined above for another day or two.
Maintaining your starter
After your starter becomes active, feed it regularly to keep it healthy. If you bake a few times a week, store it at room temperature and feed it once or twice a day; conversely, if you bake only occasionally, store it in the refrigerator and feed it once a week, allowing it to come back to room temperature before using it for baking. When feeding, always discard half of your starter and refresh it with equal parts flour and water to ensure that it remains balanced.
Throughout the process of maintaining your starter, there are a few common problems you may encounter, including:
Not bubbling? Check that you’re only using unbleached flour and filtered water; chemicals in treated flour and water can inhibit yeast growth.
Too runny or thick? Adjust the hydration by adding more flour or water as needed to achieve the desired consistency.
Not rising? The temperature could be too low, so place your starter in the oven with the light on for a short period of time. Just be sure not to leave it in there overnight.
Foul smell? A healthy starter should have a pleasantly tangy aroma. If it develops a rotten odor, it is best to discard it and start over since this may indicate harmful bacterial growth.
Creating and maintaining a sourdough starter requires patience, but the reward is fresh, flavorful bread made with simple ingredients. Even better, its uses go far beyond making a classic loaf—explore endless baking possibilities, including scones, pancakes, focaccia, bagels, donuts, and so much more!
85 Views